Author Archive

How to update theme?

If you didn’t configureĀ Envato Market auto-updates plugin (it’s recommended) you can update theme and plugins manually as follows:

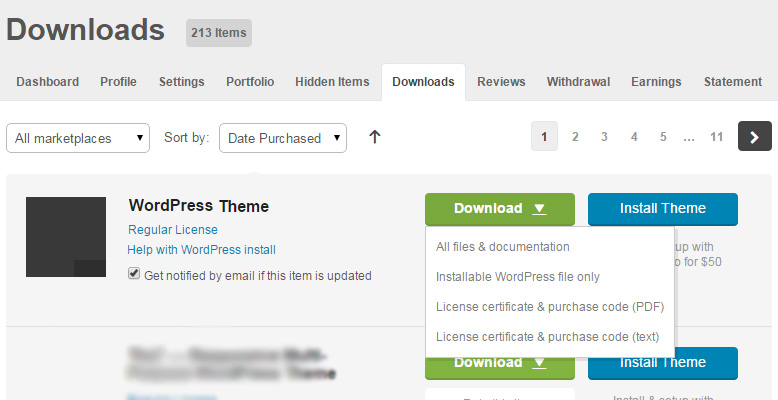
  1. Go to your downloads section on ThemeForestĀ http://themeforest.net/downloadsĀ and download theme (Installable WordPress file only) – it will be the lastest version.
  2. Extract the zip file and upload all filesĀ (overwrite old files) on your server to
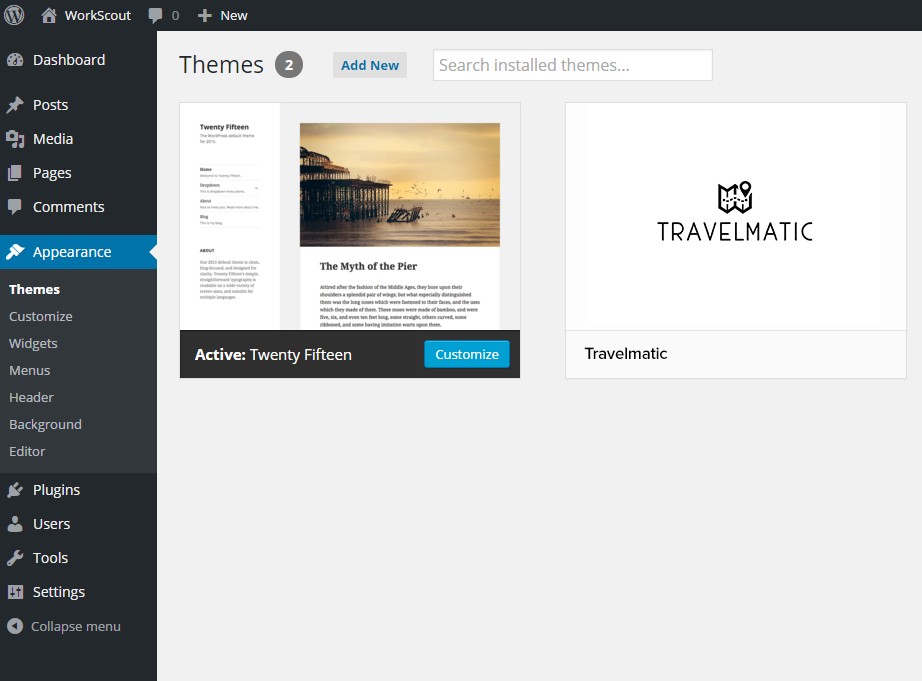
    wp-content/themes/travelmatic/
  3. After uploading new version of theme you also have to update plugins. You will see a list of plugins that require update in Appearance ā†’ Install Plugins.

You wonā€™t loose any content or settings, but if youā€™ve made any customizations to source files they will be lost, so please use Child ThemesĀ http://codex.wordpress.org/Child_ThemesĀ to modify theme .php files. šŸ˜‰

Creating Google Maps API Key

All new created websites are required by Google to use an API key to access the Google Maps API services.

Billing

To use the Maps JavaScript API, you must enable billing. You can enable billing separately (seeĀ Usage and Billing) or when you get your API key.

How to generate API key?

To generate yourĀ API key, you need toĀ  access the Google Developer console. In the Google Developers Console, follow these steps:


Create Project


Generate API Key

It’s important to add your website URL to ” Accept requests from these HTTP referrers” field, make sure to add it as

http://yourpage.com/*

or if you’re on https

https://yourpage.com/*

This way all subdomains and subpages will be accepted. After adding it, click Create.Ā It sometimes takes couple minutes to have your site accepted.

Make sure your domain is wrapped withĀ asterisks like in example. Sometimes however this is not enough and you’ll see errors in Chrome Console that you’re website is not authorized to use that API. In that case, set the Key Restriction to “None


Copy API Key

And paste it in Setup Wizard – API Key stepĀ or if you skipped that step you can add your key in Travelmatic ā†’ Map Options

Then from the menu on the left navigate to ““Library” then find “Google Maps JavaScript API“,Ā  “Google Maps Geocoding API” and “Google Maps Places API” and enable them.

ChooseĀ Google Maps JavaScript API andĀ Enable service:

Done! Your maps should be working now.

How to improve page load speed?

If you want to speed up your WordPress site our article might be interesting to you. Fast loading pages improve user experience, increase your pageviews, and help with your WordPress SEO.

In this article, we will share the most useful WordPress speed optimization tips to boost WordPress performance and speed up your website.


1. Enable GZIP compression

You can do it using WP Performance Score Booster plug-in or manually by adding the following to your .htaccess file:

# compress text, html, javascript, css, xml:
AddOutputFilterByType DEFLATE text/plain
AddOutputFilterByType DEFLATE text/html
AddOutputFilterByType DEFLATE text/xml
AddOutputFilterByType DEFLATE text/css
AddOutputFilterByType DEFLATE application/xml
AddOutputFilterByType DEFLATE application/xhtml+xml
AddOutputFilterByType DEFLATE application/rss+xml
AddOutputFilterByType DEFLATE application/javascript
AddOutputFilterByType DEFLATE application/x-javascript

# Or, compress certain file types by extension:
<files *.html>
SetOutputFilter DEFLATE
</files>

Before we start I should explain what content encoding is. When you request a file like http://www.yahoo.com/index.html, your browser talks to a web server. The conversation goes a little like this:

HTTP_request.png

  1. Browser: Hey, GET me /index.html
  2. Server: Ok, let me see if index.html is lying aroundā€¦
  3. Server: Found it! Hereā€™s your response code (200 OK) and Iā€™m sending the file.
  4. Browser: 100KB? Ouchā€¦ waiting, waitingā€¦ ok, itā€™s loaded.

Well, the system works, but itā€™s not that efficient. 100KB is a lot of text, and frankly, HTML is redundant. Every <html>, <table> and <div> tag has a closing tag thatā€™s almost the same. Words are repeated throughout the document. Any way you slice it, HTML (and its beefy cousin, XML) is not lean.

And whatā€™s the plan when a fileā€™s too big? Zip it!

If we could send a .zip file to the browser (index.html.zip) instead of plain old index.html, weā€™d save on bandwidth and download time. The browser could download the zipped file, extract it, and then show it to user, whoā€™s in a good mood because the page loaded quickly. The browser-server conversation might look like this:

HTTP_request_compressed.png

  1. Browser: Hey, can I GET index.html? Iā€™ll take a compressed version if youā€™ve got it.
  2. Server: Let me find the fileā€¦ yep, itā€™s here. And youā€™ll take a compressed version? Awesome.
  3. Server: Ok, Iā€™ve found index.html (200 OK), am zipping it and sending it over.
  4. Browser: Great! Itā€™s only 10KB. Iā€™ll unzip it and show the user.

The HTML portion of the yahoo home page goes from 101kb to 15kb after compression:

yahoo_compression.PNG


2. Install a WordPress Caching Plugin

We recommend using the WP Super Cache:

WP Super Cache


WordPress pages are ā€œdynamic.ā€ This means theyā€™re built on the fly every time someone visits a post or page on your website. To build your pages, WordPress has to run a process to find the required information, put it all together, and then display it to your user.

This process involves a lot of steps, and it can really slow down your website when you have multiple people visiting your site at once.

Thatā€™s why we recommend every WordPress site use a caching plugin.Ā Caching canĀ make your WordPress site anywhere from 2x to 5x faster.

Hereā€™s how it works: Instead of going through the whole page generation process every time, your caching plugin makes a copy of the page after the first load, and then serves thatĀ cached version toĀ every subsequent user.

How caching works

As you can see in the graphics above, when a user visits your WordPress site, which is built using PHP, your server retrieves information from a MySQL database and your PHP files, and then itā€™s all put together into a HTML content which is served served to the user. Itā€™s a long process, but you can skip a lot of it when you use caching instead.


3. Optimize Images for Speed

If your images arenā€™t optimized, they could be hurting more than helping. In their original formats, these photos can have huge file sizes. But based on the image file format and the compression you choose in your editing software, you can decrease your image size by up to 5x.

We recommend using Smush Image Compression and Optimization plugin:

Smush Image Compression and Optimization


4. Use a Content Delivery Network (CDN)

https://gtmetrix.com/blog/wp-content/uploads/2017/02/cdn-example.png

Users in different geographical locationsĀ may experience different loading times on your site. Thatā€™s because the location of your web hosting an have an impact on your siteĀ speed. For example, letā€™s say your web hosting company has its servers in the United States. A visitor whoā€™s also in the United States will generally see faster loading times than a visitor in Europe.

A CDN is a network made up of servers all around the world. When you use a CDN, every time a user visits your website they are served those static files from whichever server is closest to them.Ā Your own web hosting server will also be faster since the CDN is doing a lot of the work.

We recommend MaxCDN. It works well with WordPress websites and complementsĀ your existing WordPress caching plugins for even faster loading times. See guide on how to install and setup WordPress CDN solution MaxCDNĀ to get started.


Sources of this article:
http://www.wpbeginner.com/wordpress-performance-speed/
http://betterexplained.com/articles/how-to-optimize-your-site-with-gzip-compression/

Theme Installation

There are two ways to install theme

Upload through FTP

  1. Extract theĀ ā€œtravelmatic.zipā€
  2. Open up your FTP manager and connect to your hosting
  3. Browse to wp-content/themes
  4. Upload the TravelmaticĀ theme folder.
  5. Log Into WordPress and go to Appearance – Themes
  6. Find the Travelmatic and click activate

Upload through WordPress

  1. Download theĀ ā€œInstallable WordPress file onlyā€Ā you’ll find itĀ here
  2. Navigate toĀ Ā AppearanceĀ ā†’ Themes ā†’ Add NewĀ ā†’Ā Upload.
  3. Follow the instructions on the screen, select the downloaded theme folder (ā€œtravelmatic.zipā€).
  4. HitĀ Install Now and the theme will be uploaded and installed.

Once the theme is uploaded, you need to activate it. Go toĀ Ā Appearance ā†’Ā Themes and activate Travelmatic.